This page shows how to set up Single Sign-On (SSO) between OneLogin and your digital signage account using OpenID Connect (OIDC), so your users sign in with their OneLogin account. You do it in OneLogin and in Settings > Single Sign-On. For how SSO works, see Single Sign-On (SSO).
Before you start
- Admin access to OneLogin.
- The account owner’s sign-in: only the account owner can set up SSO.
- Access to your domain’s DNS settings, to add one TXT record that proves you own your email domain.
- The redirect URI for OneLogin: the SSO page doesn’t show a redirect URI for OIDC, so ask our support team for it.
1. Create a custom connector in OneLogin
- In OneLogin, go to Applications > Custom Connectors.
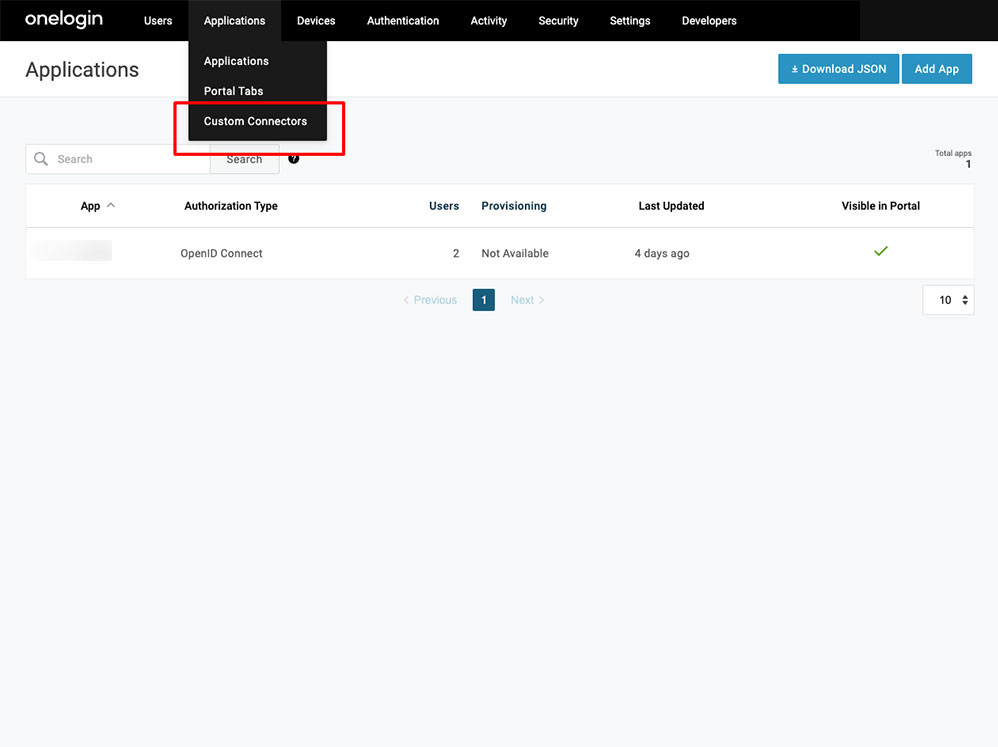
- Create a new connector and give it a name. You can upload icons for your app catalog.
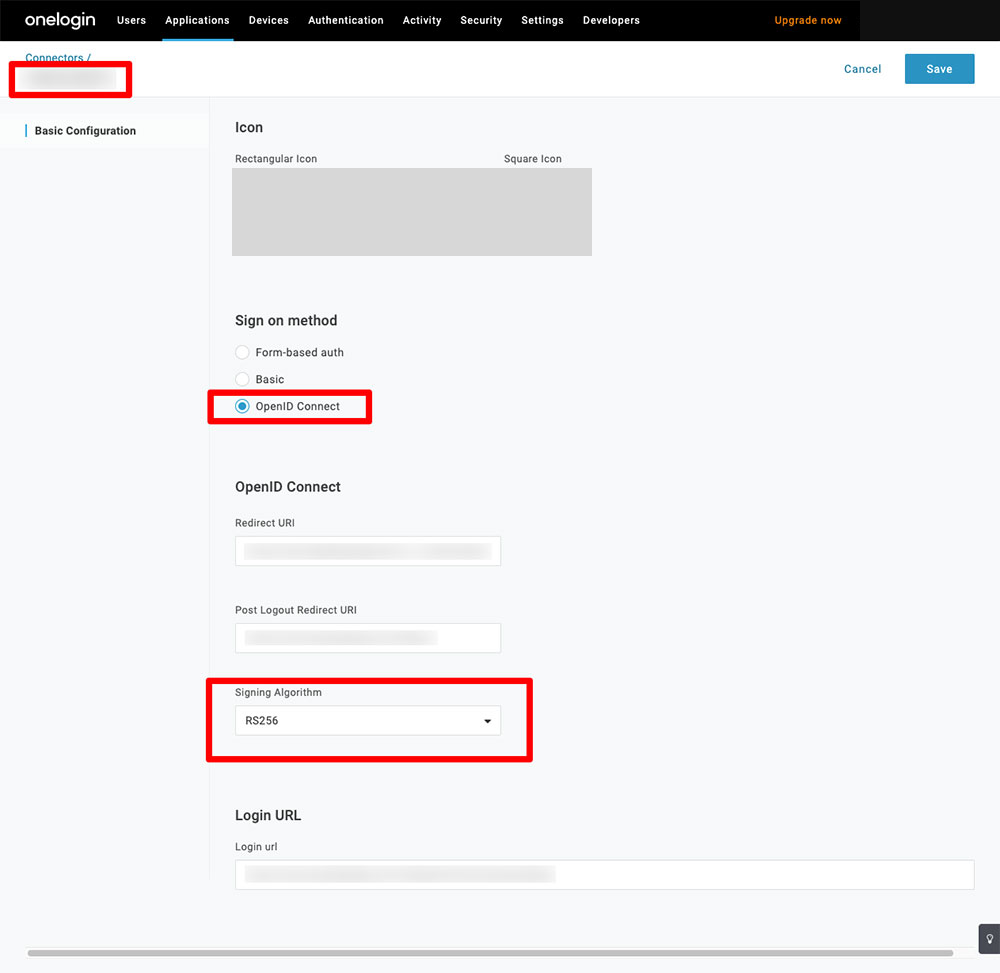
- Under Sign on method, choose OpenID Connect.
- Enter the Redirect URI you received from our support team.
- Choose RS256 as the Signing Algorithm.
- Click Save.
2. Add the app to your catalog
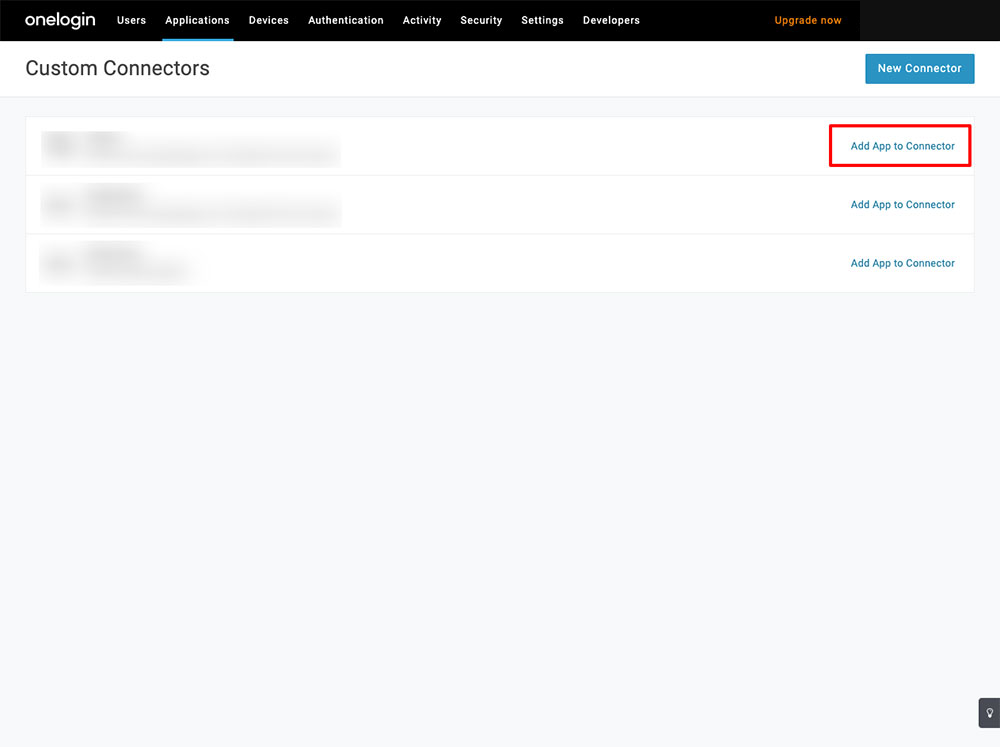
- In Custom Connectors, click Add App to Connector next to your connector.
- Fill in the details and click Save.
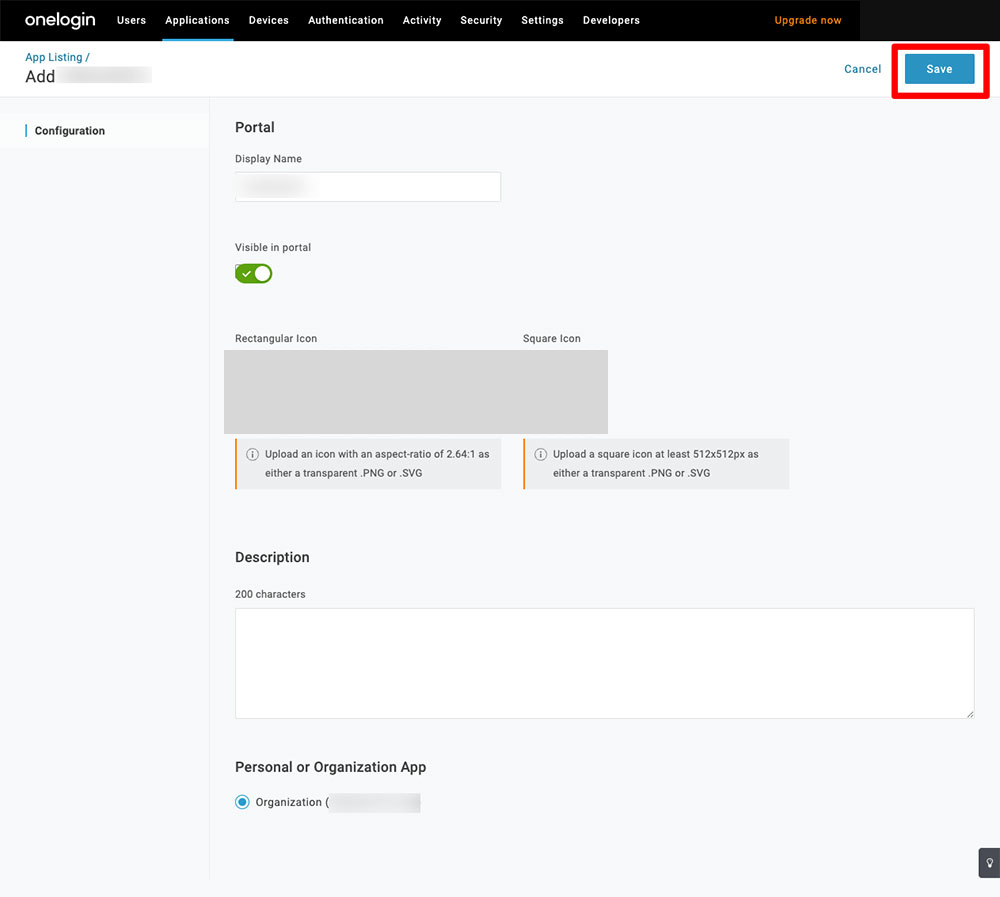
- Under Access or Users, give the users who should sign in access to the app.
3. Copy the OneLogin details
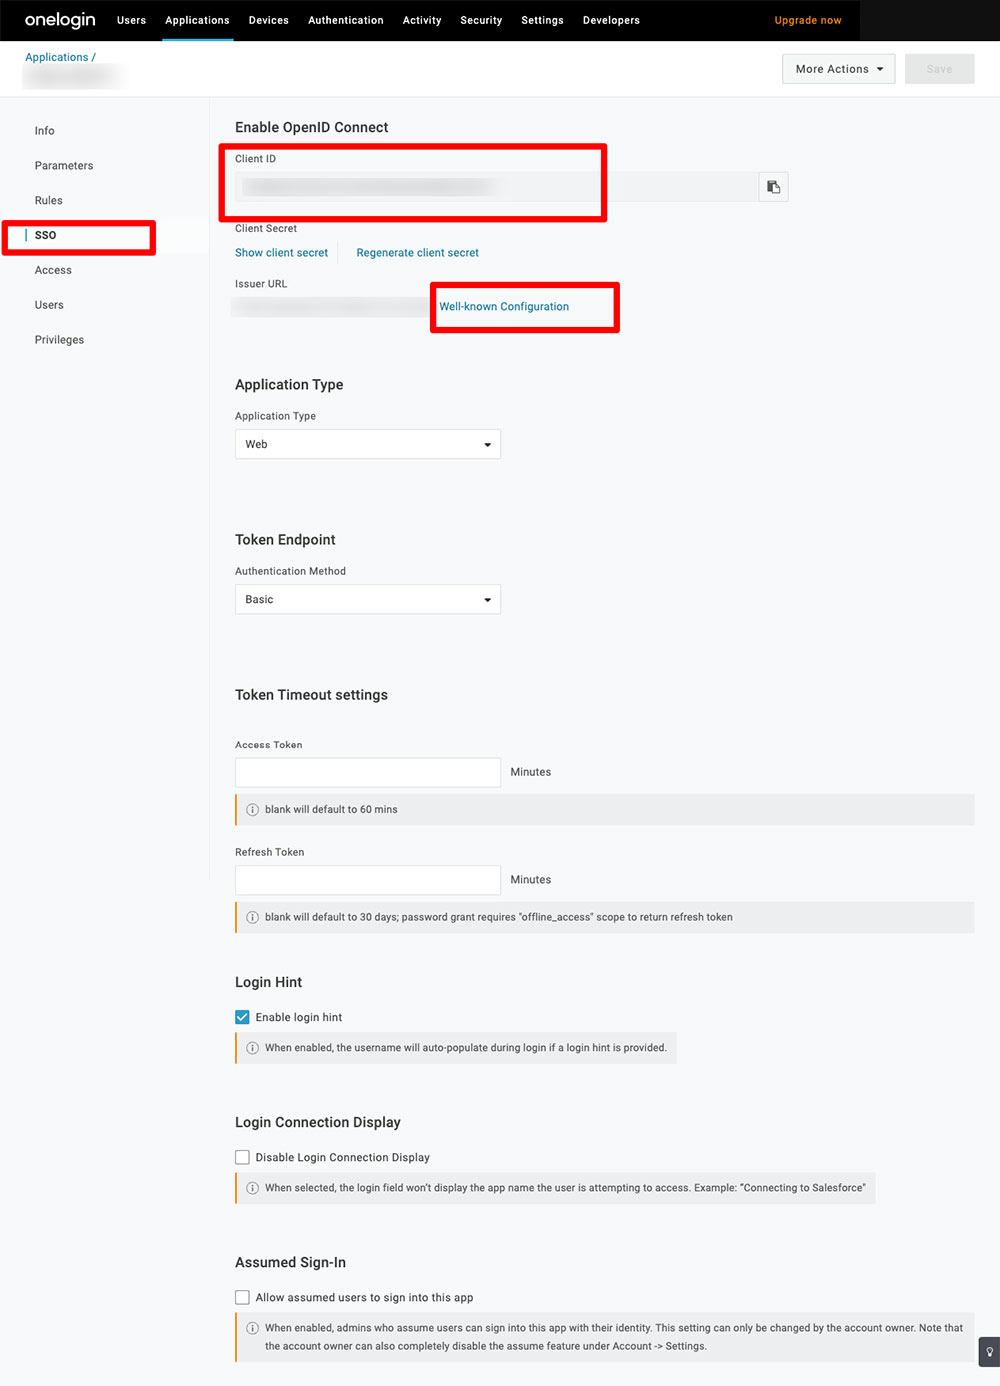
On the app’s SSO tab, copy the Client ID, the Client Secret (click Show client secret) and the Issuer URL.
4. Enter the details on the SSO page
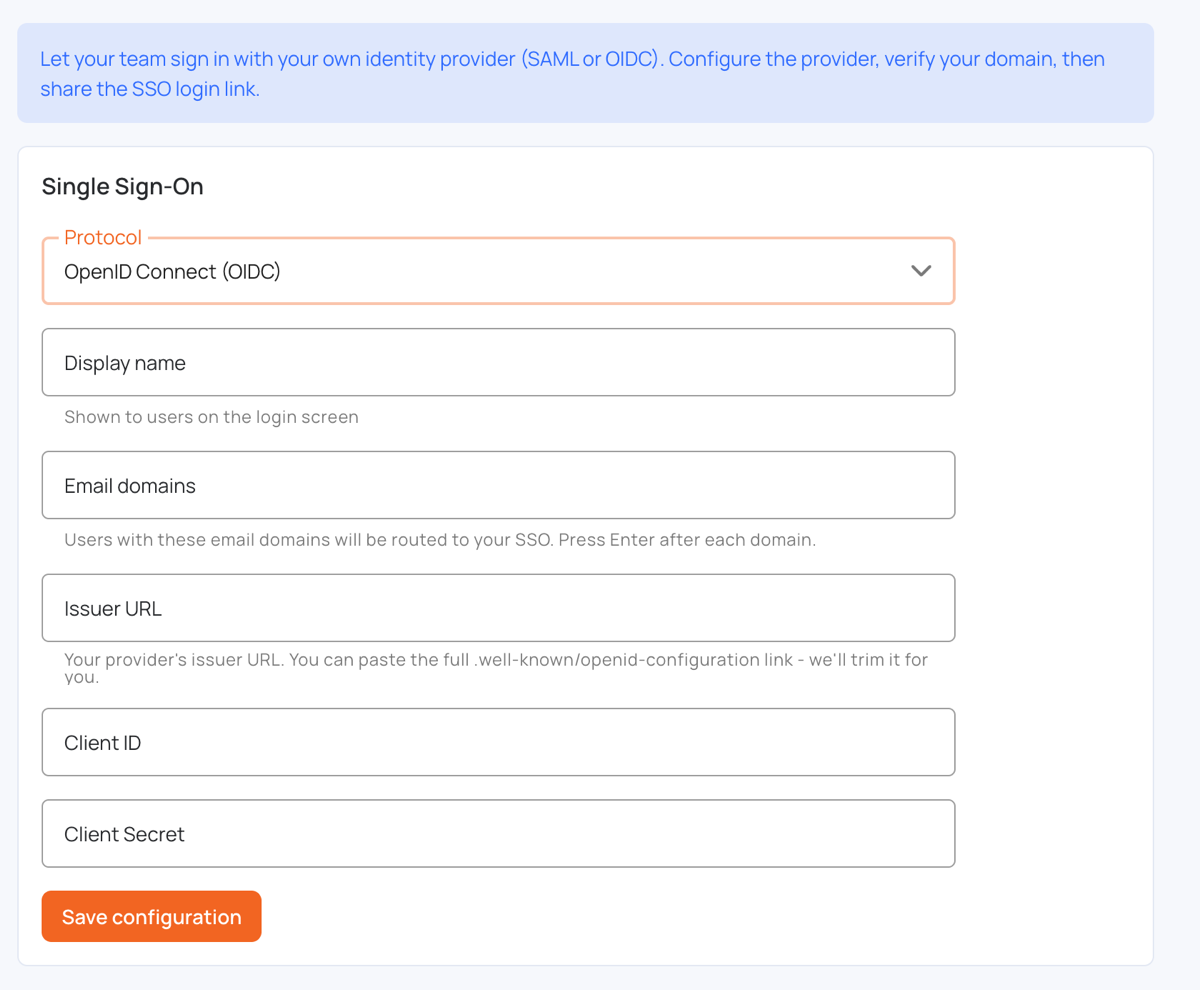
- Go to Settings > Single Sign-On.
- Set Protocol to OpenID Connect (OIDC).
- Enter a Display name and your Email domains.
- Paste the Issuer URL, the Client ID and the Client Secret. You can paste the full
.well-known/openid-configurationlink as the Issuer URL; it is trimmed for you. - Click Save configuration.
5. Verify your domain and sign in
- The Domain verification panel shows a TXT record. Add it in your DNS provider, then click Verify domain.
- When the domain is verified, your users can sign in with Log in with SSO on the login page, with the SSO login link, or by typing their work email.
- Once SSO works, you can switch on Enforce SSO for these domains.
See Single Sign-On (SSO) for each of these steps, enforcing SSO and troubleshooting.
To decide what each user can do, see Teams.