This page shows how to set up Single Sign-On (SSO) between Microsoft Entra ID (Azure Active Directory) and your digital signage account using SAML 2.0, so your users sign in with their Microsoft work account. You do it yourself, in the Azure portal and in Settings > Single Sign-On. For how SSO works, see Single Sign-On (SSO).
Before you start
- Admin access to Microsoft Entra ID in the Azure portal.
- The account owner’s sign-in: only the account owner can set up SSO.
- Access to your domain’s DNS settings, to add one TXT record that proves you own your email domain.
- An SP Entity ID: a name you choose for the application, for example
mycompany-signage. You enter exactly the same value in Azure and on the SSO page.
1. Create the application in Azure
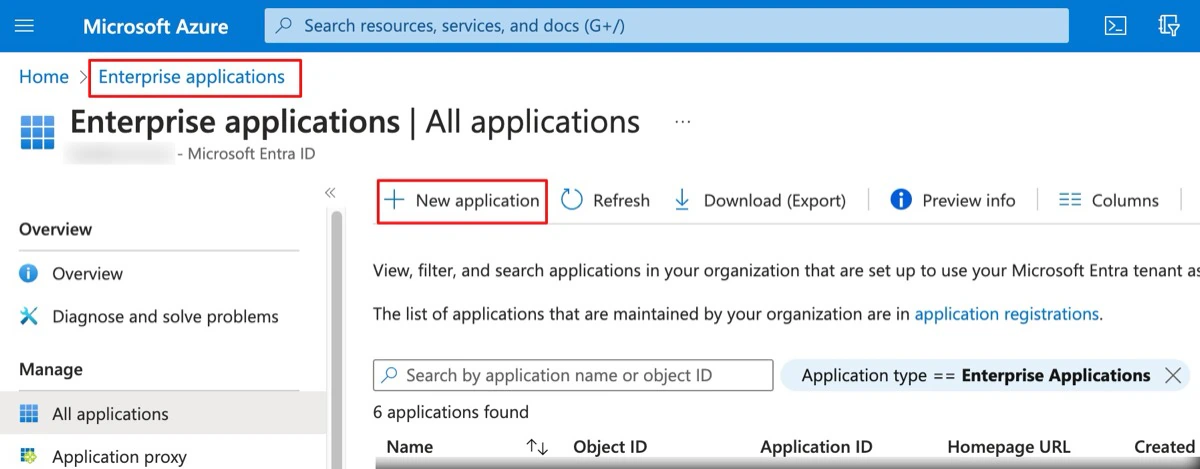
- In the Azure portal, go to Enterprise applications and click New application.
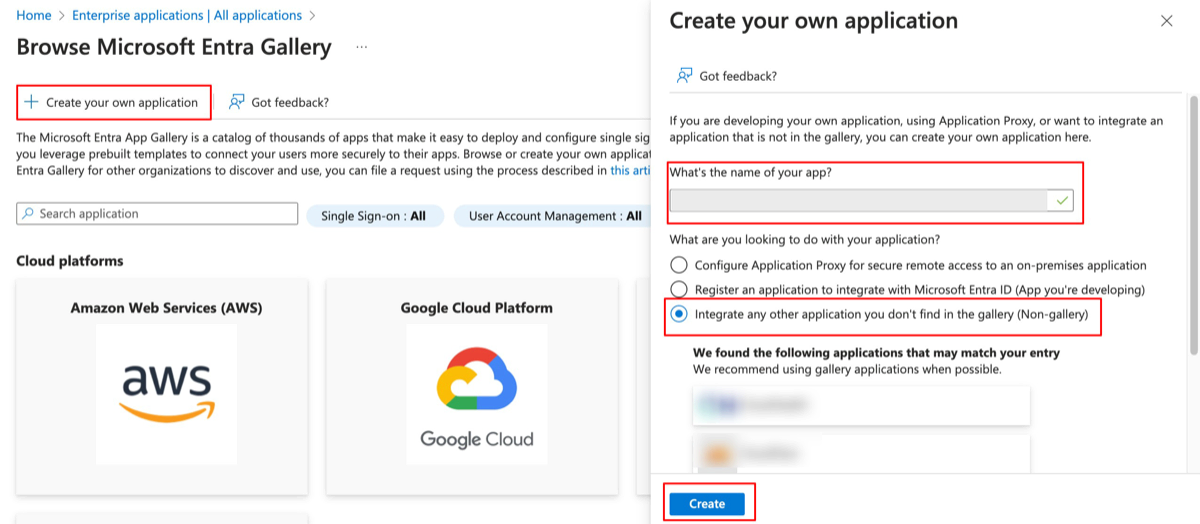
- Click Create your own application, enter a name for the app, for example Digital Signage, and choose Integrate any other application you don’t find in the gallery (Non-gallery).
- Click Create.
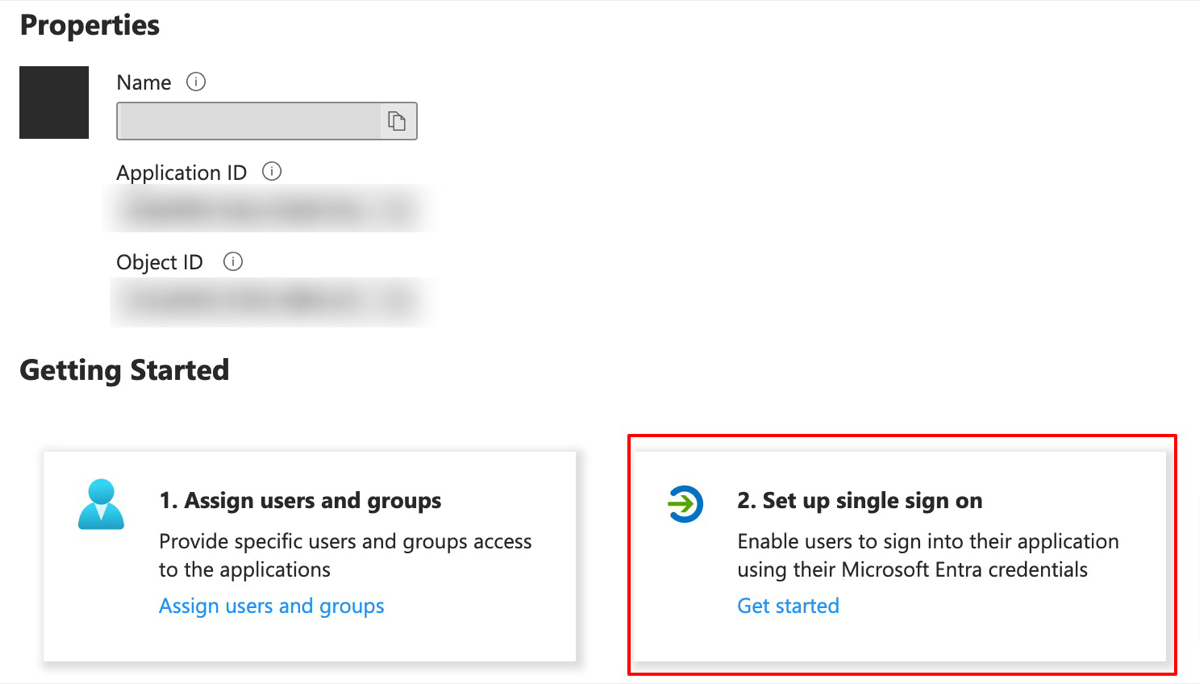
- In the new application, click Set up single sign on, then choose SAML.
2. Copy the Azure details
- Under SAML Certificates, download the Federation Metadata XML file. The SSO page can read the identifier, sign-in URL and certificate from it.
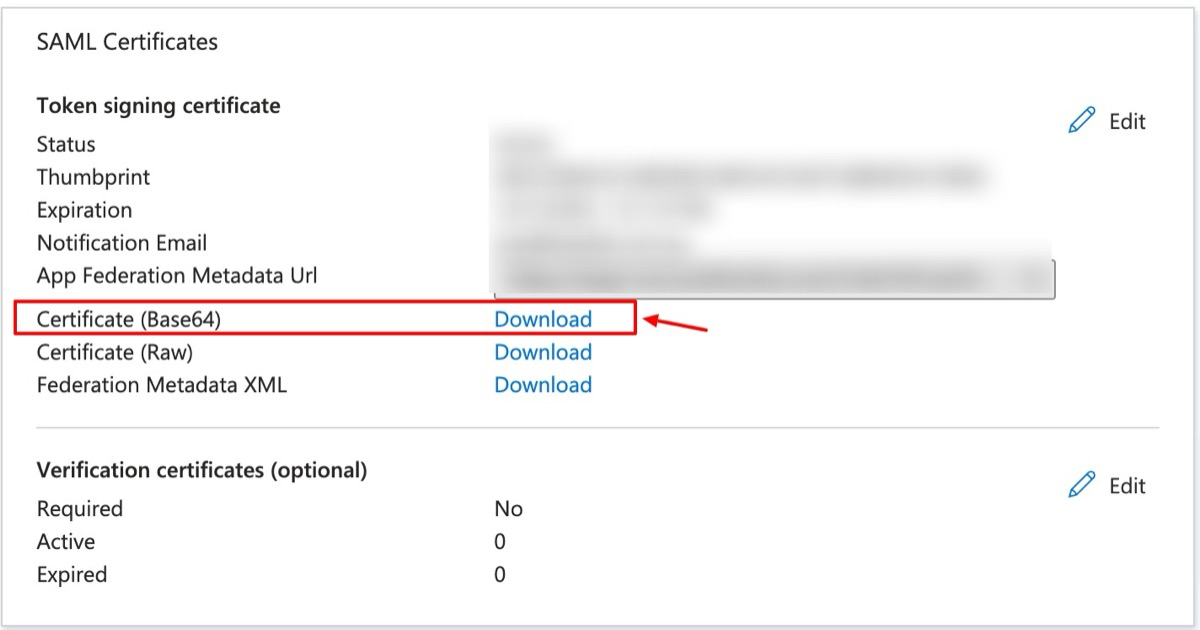
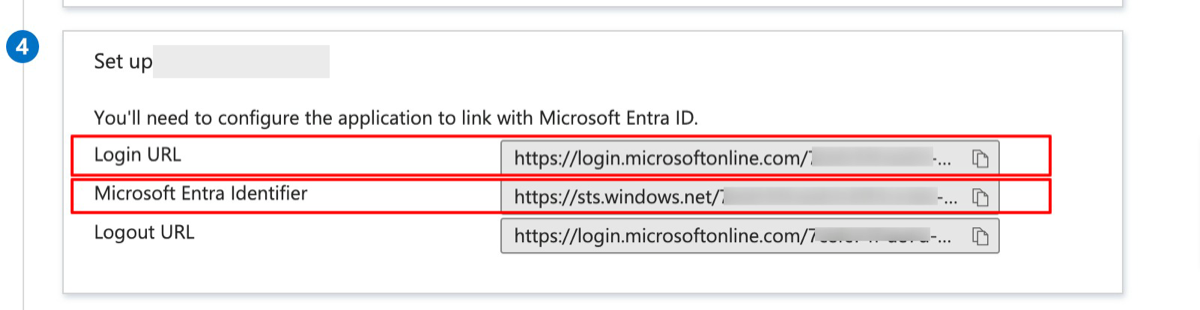
- If you prefer to enter the details by hand, download Certificate (Base64) instead, and copy the Login URL and the Microsoft Entra Identifier from the Set up section.
3. Enter the details on the SSO page
- Go to Settings > Single Sign-On.
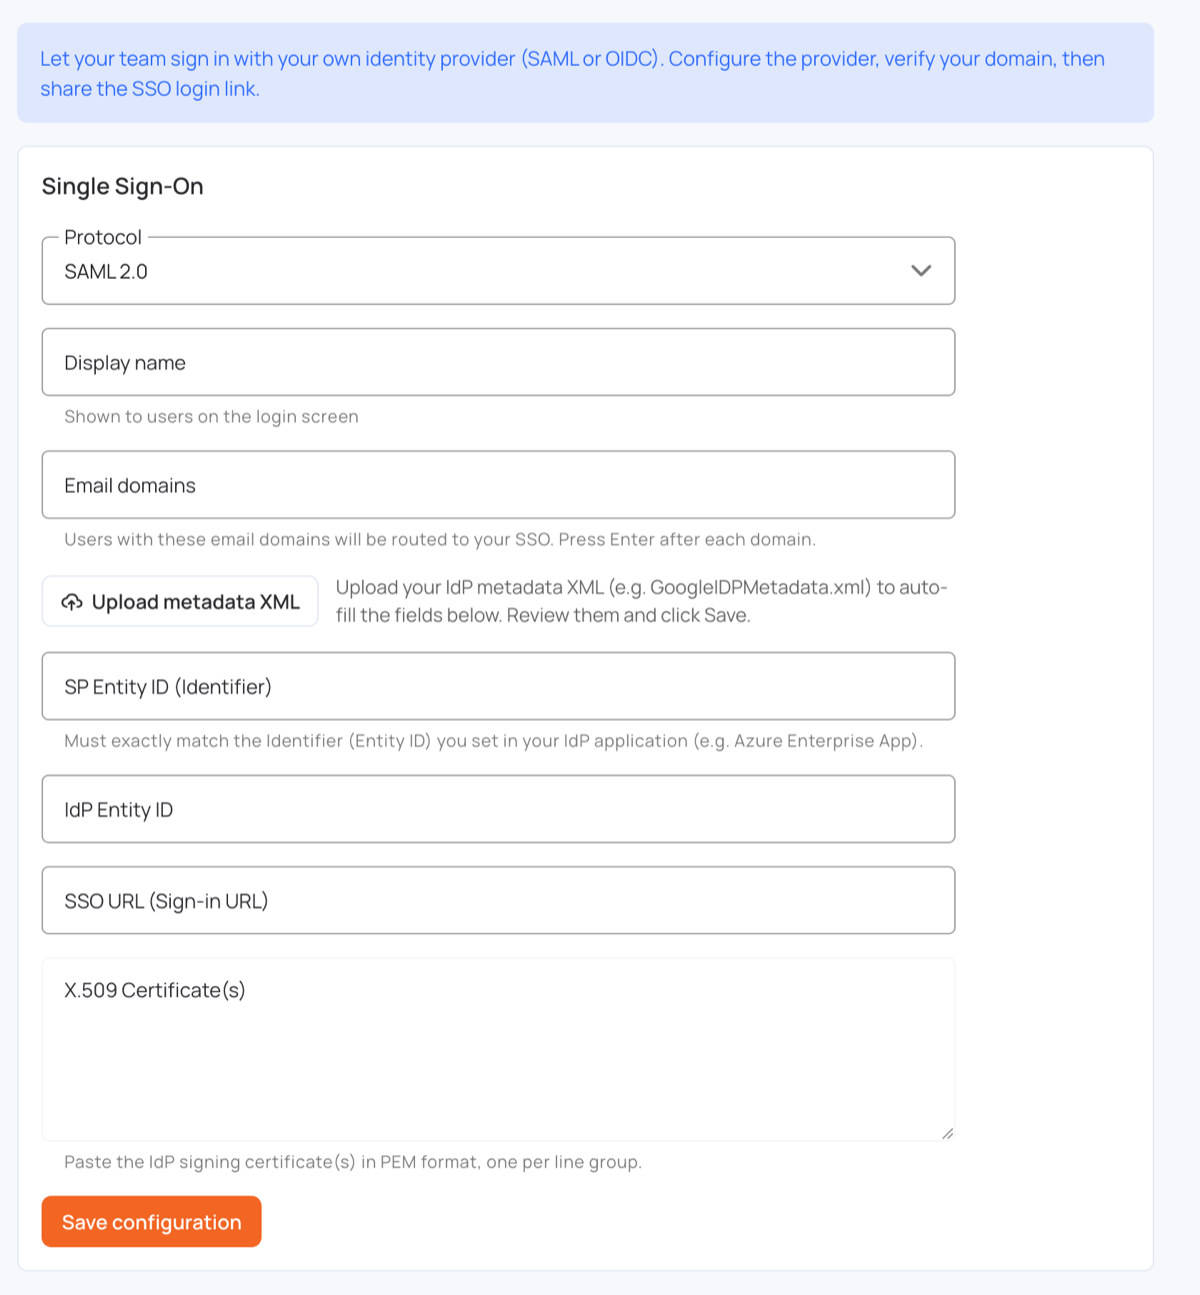
- Keep Protocol on SAML 2.0.
- Enter a Display name and your Email domains.
- Click Upload metadata XML and choose the Federation Metadata XML file from Azure. This fills in the IdP Entity ID, the SSO URL (Sign-in URL) and the X.509 Certificate(s). Check them.
- Or enter them by hand: the Microsoft Entra Identifier goes in IdP Entity ID, the Login URL in SSO URL (Sign-in URL), and the contents of the Base64 certificate file in X.509 Certificate(s).
- Enter your SP Entity ID (Identifier).
- Click Save configuration.
After saving, the page shows the Reply URL (ACS) with a Copy button.
4. Finish the Azure settings
- Back in Azure, under Basic SAML Configuration, click Edit.
- Under Identifier (Entity ID), add your SP Entity ID, exactly as you entered it on the SSO page.
- Under Reply URL (Assertion Consumer Service URL), paste the Reply URL (ACS) you copied from the SSO page.
- Click Save.
- Make sure Azure sends the user’s email address: under Attributes & Claims, the default
emailaddressclaim (user.mail) works. If some users have no mail value, map it touser.userprincipalnameinstead. - Under Users and groups, assign the users or groups who should be able to sign in.
5. Verify your domain and sign in
- The Domain verification panel shows a TXT record. Add it in your DNS provider, then click Verify domain.
- When the domain is verified, your users can sign in with Log in with SSO on the login page, with the SSO login link, or by typing their work email.
- Once SSO works, you can switch on Enforce SSO for these domains.
See Single Sign-On (SSO) for each of these steps, enforcing SSO and troubleshooting.
Troubleshooting
“AADSTS700016: Application … was not found in the directory”:
The SP Entity ID on the SSO page and the Identifier (Entity ID) in Azure don’t match. Make them identical, character for character.A user can’t sign in:
Check that the user, or a group they belong to, is assigned to the application under Users and groups in Azure.
To decide what each user can do, see Teams.